Windows 7, 8.1, and 10 install from source instructions
Download and install the Microsoft Visual C++ Compiler for Python 2.7.
- Download from https://www.microsoft.com/en-us/download/details.aspx?id=44266
- Run the installer with the default options.
Download and install the Microsoft Visual C++ 2008 SP1 Redistributable Package (x86).
- Download from https://www.microsoft.com/en-us/download/details.aspx?id=5582
- Run the installer with the default options.
Install 32 bit python 2.7 from python.org. Make sure pip is installed, and add python to the windows path.
- Download the 32 bit python 2.7 installer for windows from
https://www.python.org/downloads/windows/
- Select the latest release (2.7.14 as of 3/16/18).
- Download the Windows x86 MSI Installer (NOT the x86-64 MSI Installer).
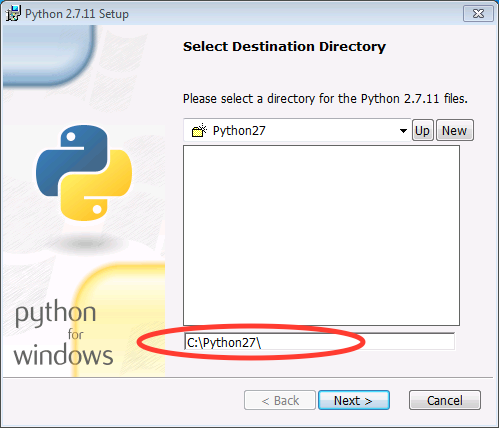
- Run the installer
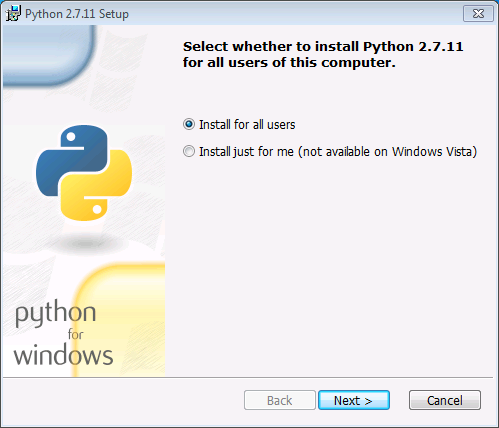
- Accept the default installation location
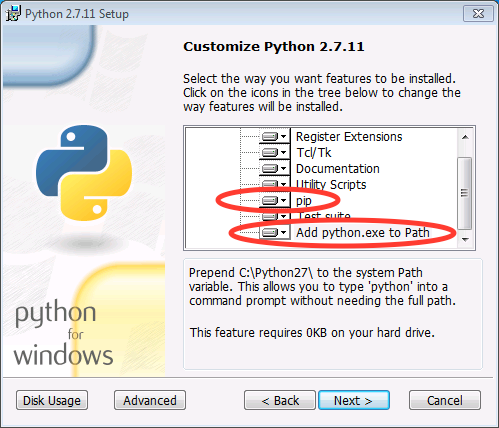
- At the customization option, make sure that pip is installed and that you add python.exe to Path.
- Download the 32 bit python 2.7 installer for windows from
https://www.python.org/downloads/windows/
Download and install the MinGW compiler
- Download
mingw-get-setup.exefrom https://sourceforge.net/projects/mingw/- The download button should default to the correct file for windows.
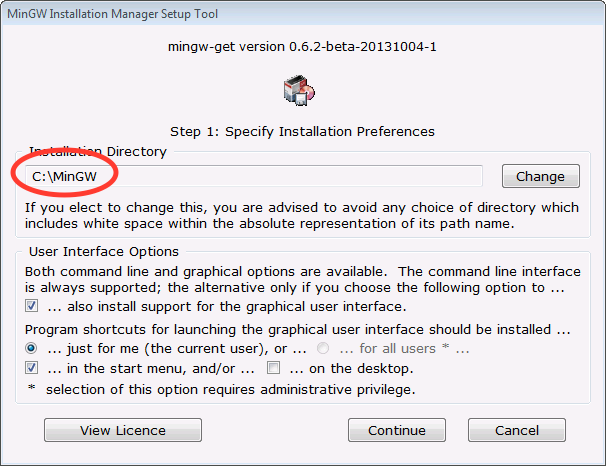
- Run the installer.
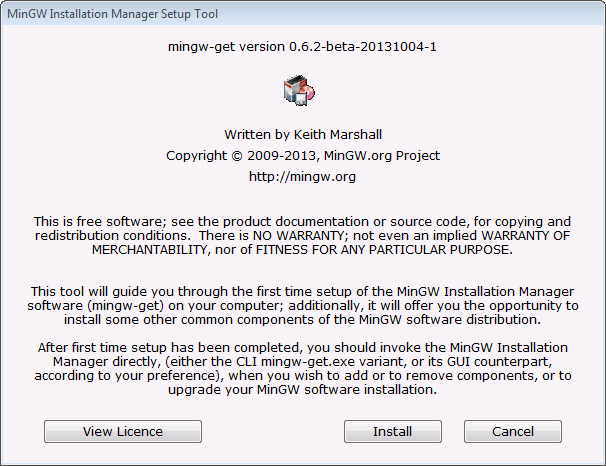
- Install to the default location
- Once the installer is finished, click continue
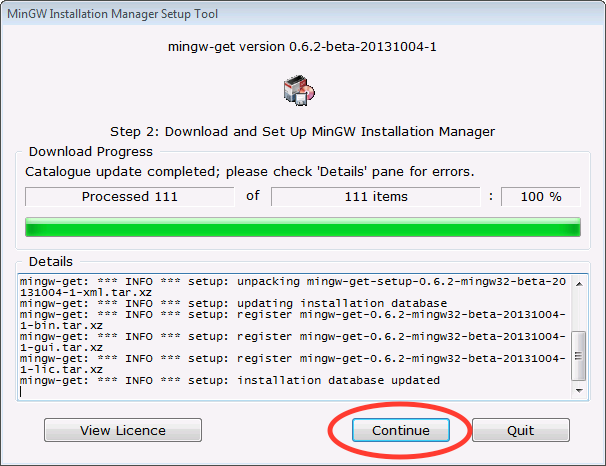
- You will see this screen:
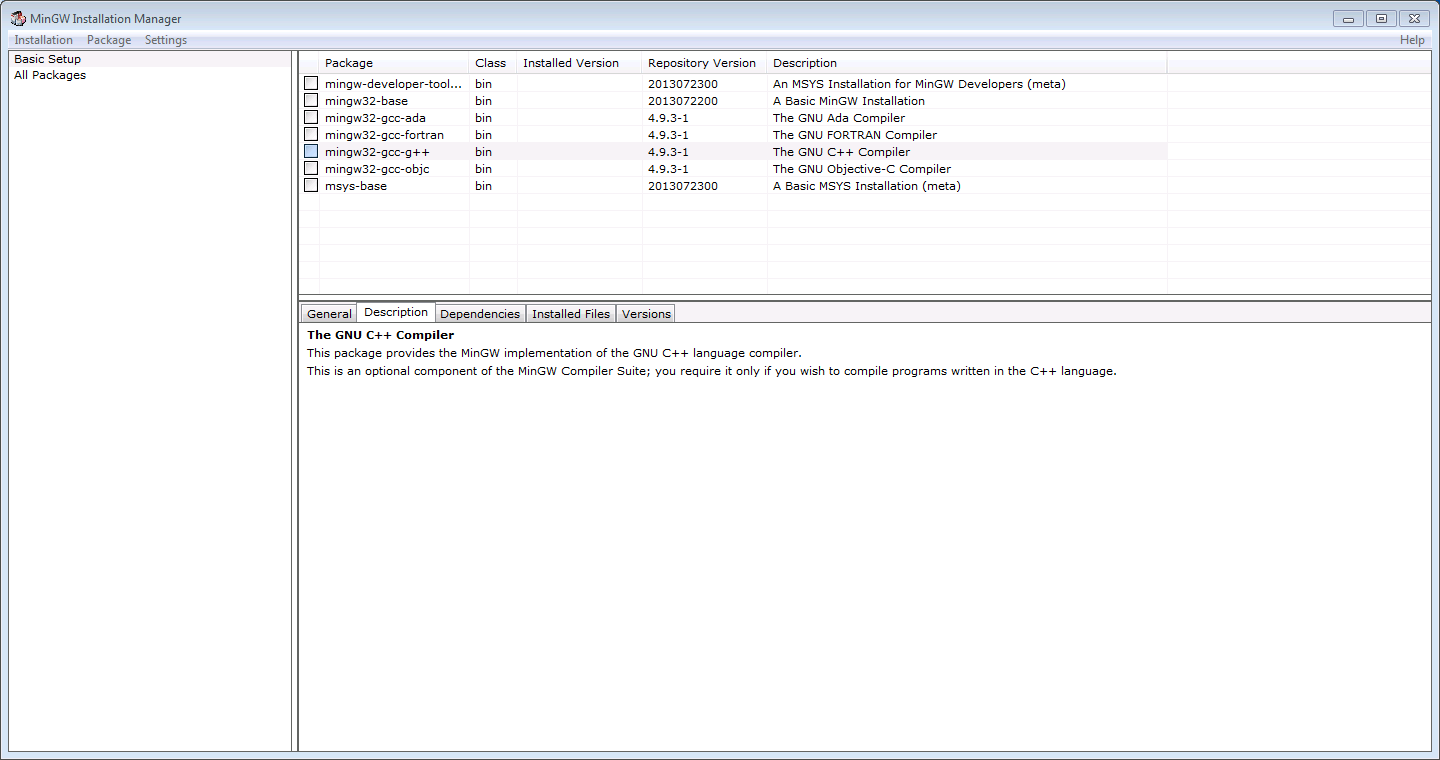
- Click the boxes for
mingw32-baseandmingw32-gcc-g++and select mark for installation.
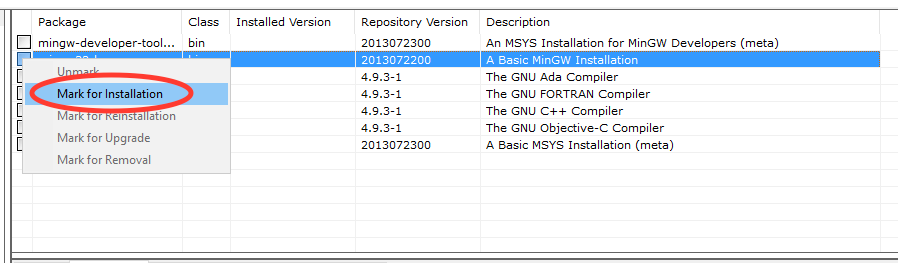
- Once selected, they should look like this:

- Click on the Installation menu and click Apply Changes.
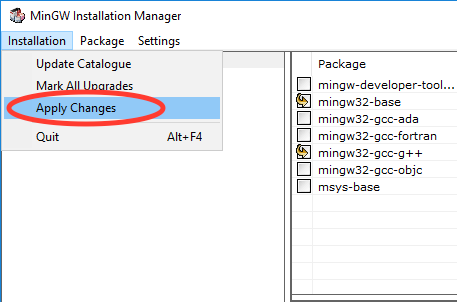
- In the windows that pops up, click Apply.
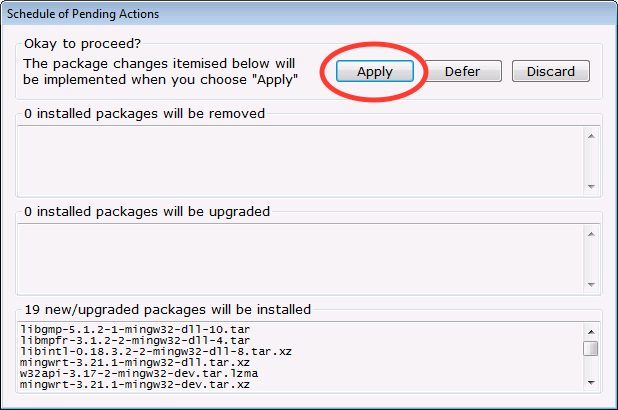
- Close the MinGW installer.
- Download
Add
mingwandmingw\binto the start of the global path variable. Use part a for Windows 7, part b for Windows 8.1, and part c for Windows 10.Windows 7:
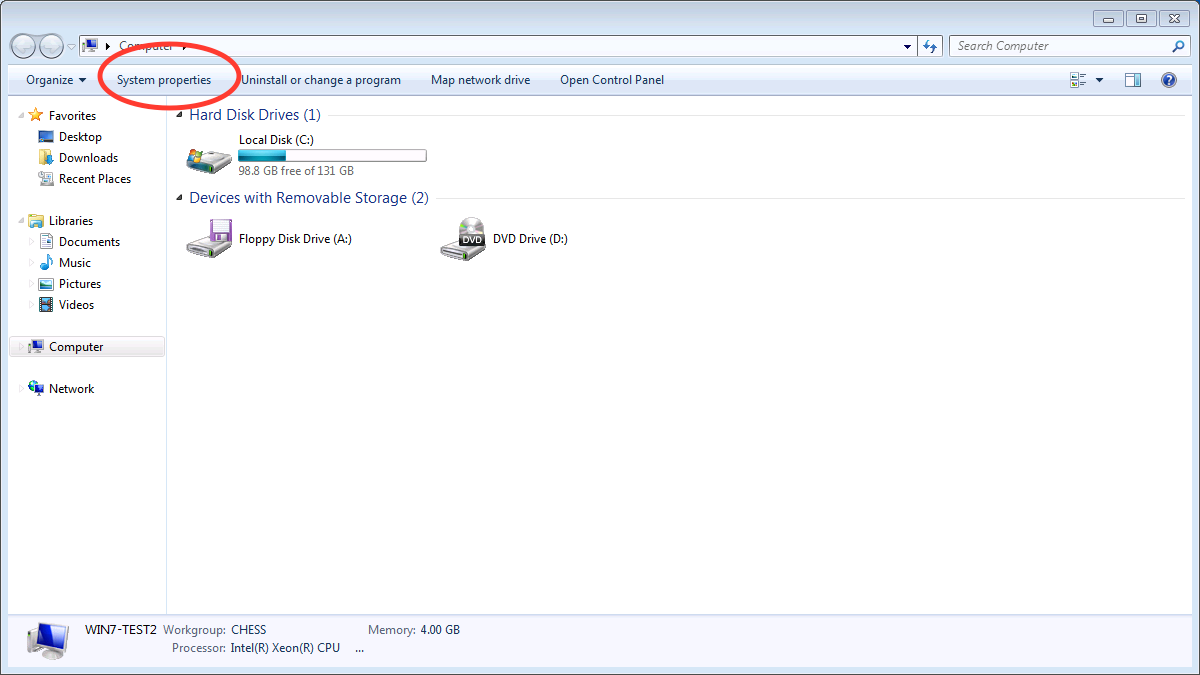
Click on the Start Menu and click on Computer.
In the window that opens, click on System properties
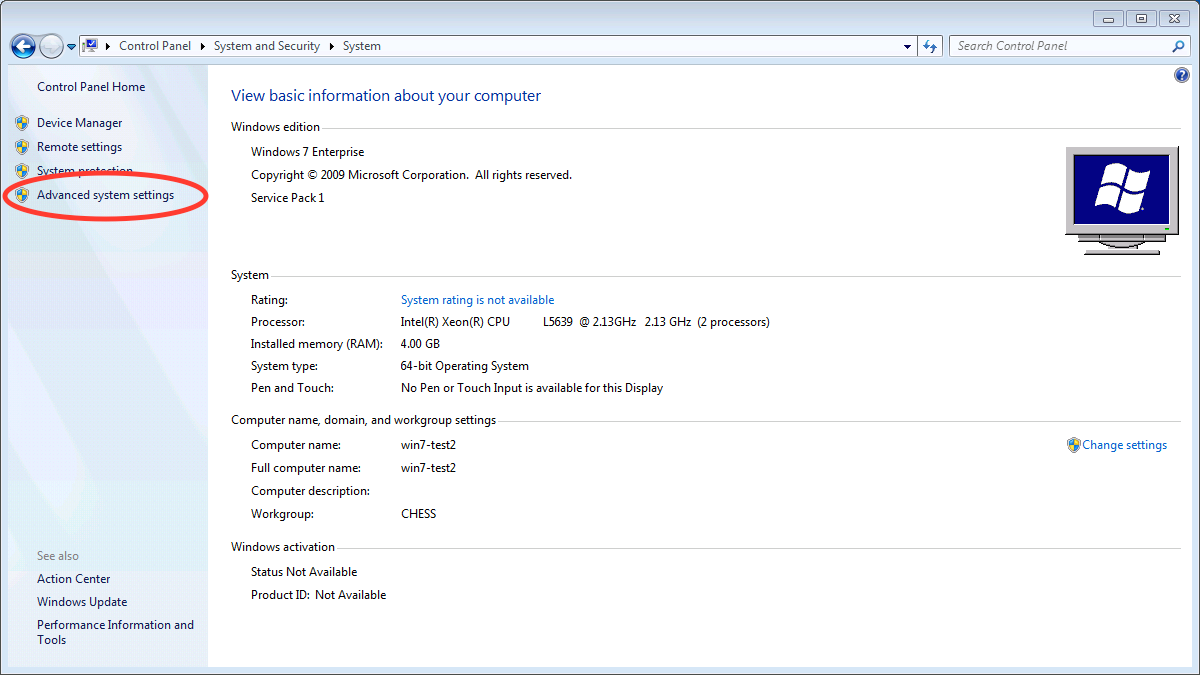
In the window that opens, click on Advanced system settings
In the window that opens, click on Environment Variables…
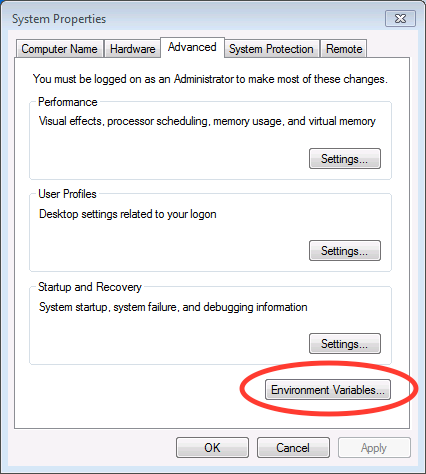
In the window that opens, In the System variables area, select the Path variable and click Edit…
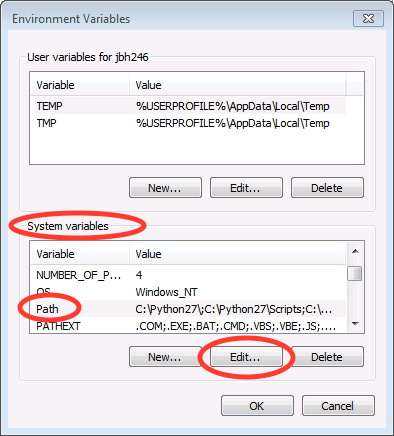
In the window that opens, add the following to the start of the path:
C:\MinGW;C:\MinGW\bin;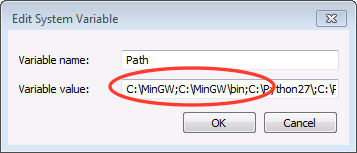
Click Ok several times to save and exit out of the settings.
Note: You can modify the User variable path instead of the System variable path if you want to only modify the setup for your user account, rather than the entire system. The same steps apply, but if you do not already have a use path variable, you will have to create one using the New button.
Windows 8.1:
Open a file browser window and click on This PC. At the top, click on System properties.
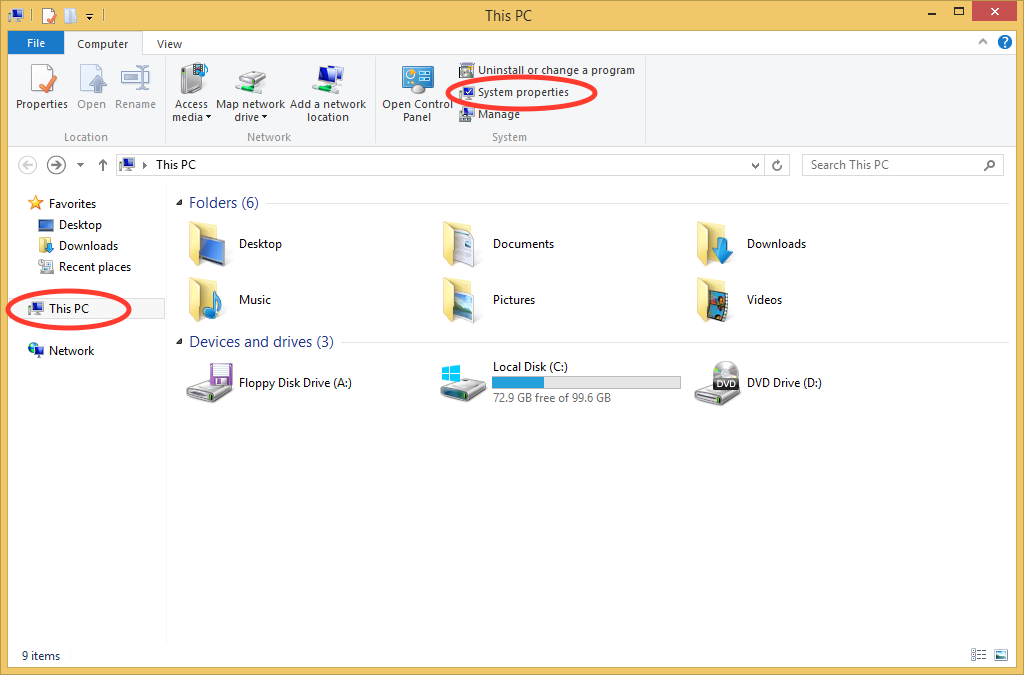
Continue with steps 3 and onward in the Windows 7 section above.
Windows 10:
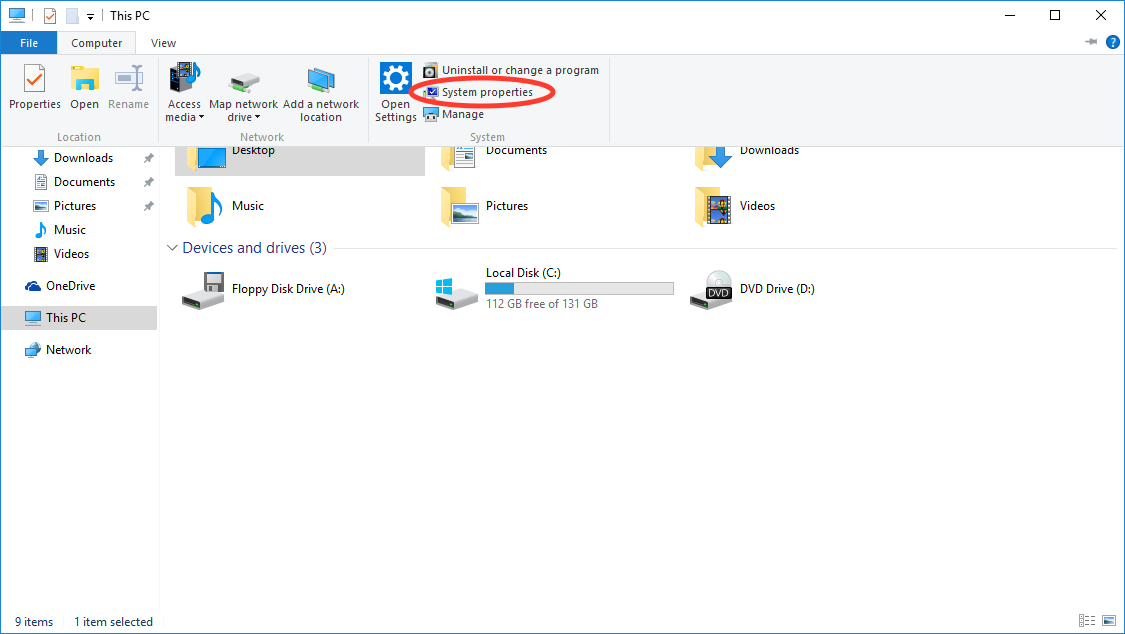
Click on the windows/start menu and click File Explorer.
In the file explorer window, click on This PC and then Computer

Then click on System properties in the new menu
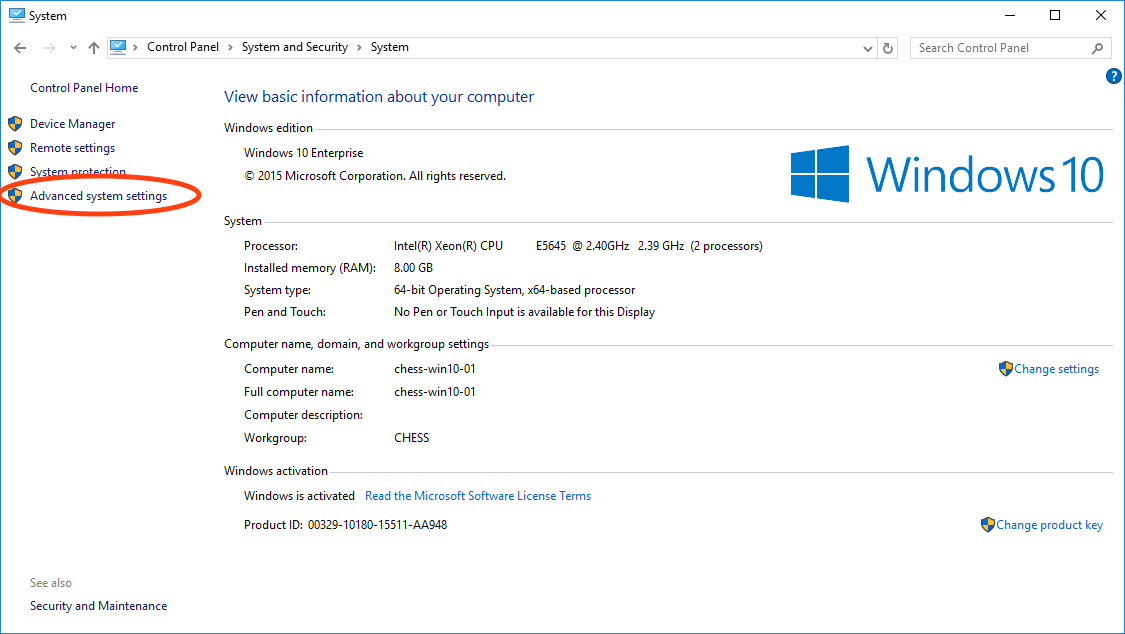
In the window that opens, click on Advanced system settings
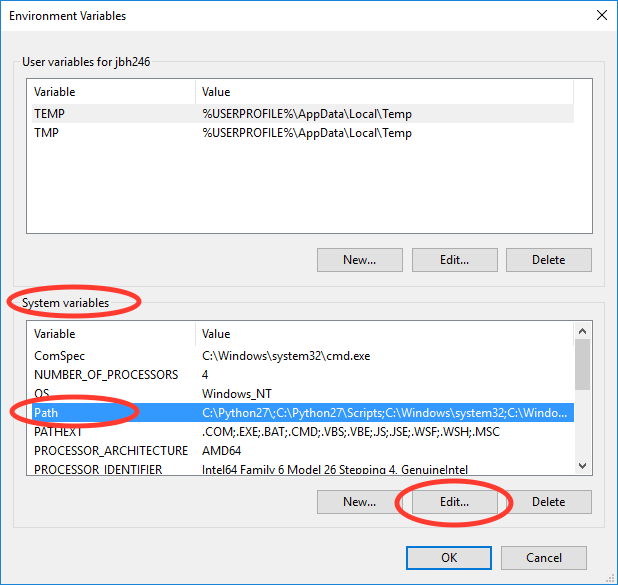
In the window that opens, click on Environment Variables…
In the window that opens, In the System variables area, select the Path variable and click Edit…
In the window that opens, use the New button to add these items to the path:
C:\MinGWC:\MinGW\bin;
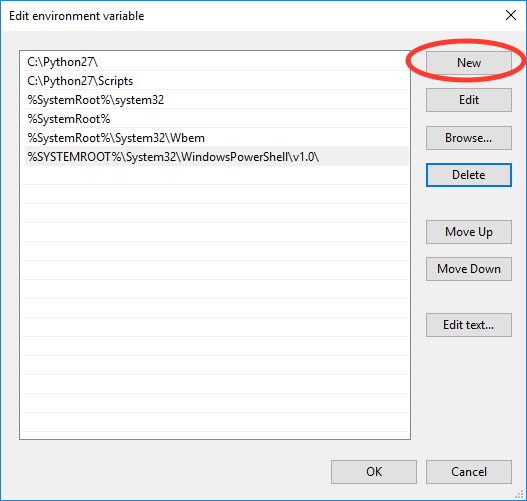
Use the Move Up button to move the items to the start of the path
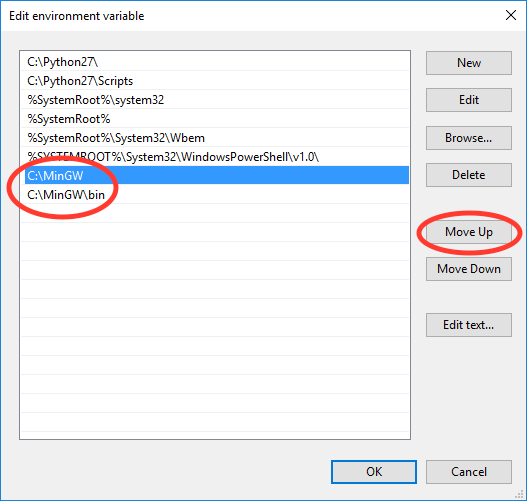
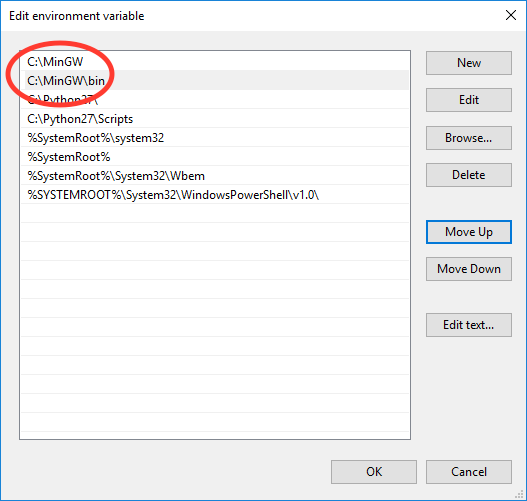
Click Ok several times to save and exit out of the settings.
Note: You can modify the User variable path instead of the System variable path if you want to only modify the setup for your user account, rather than the entire system. The same steps apply, but if you do not already have a user path variable, you will have to create one using the New button.
Restart your computer.
- Downgrade the gcc compilers.
- Open a command prompt
- Windows 7: Click on the start menu, search for
cmd, then run thecmdprogram. - Windows 8: Click on the windows tile and search for
cmd, then run theCommand Promptprogram. - Windows 10: Click on the windows/start menu, select All Files, select
Windows System, and click on
Command Prompt.
- Windows 7: Click on the start menu, search for
- Type
mingw-get upgrade "gcc<6"and hit enter. - Type
mingw-get upgrade "g++<6"and hit enter.
- Open a command prompt
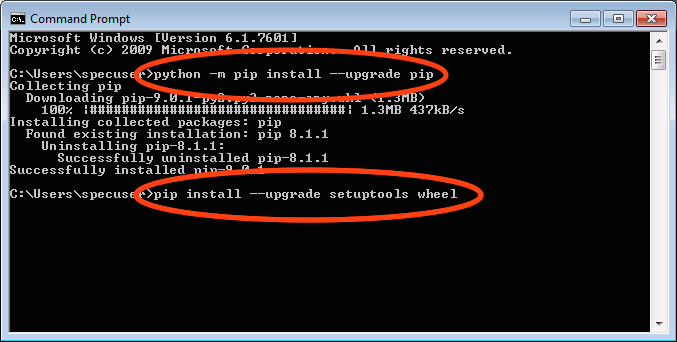
- Upgrade pip, setuptools, and wheel.
- Open a command prompt window as in the previous step (if necessary).
- Type
python -m pip install --upgrade pip - Hit enter
- Once that finishes, type
pip install --upgrade setuptools wheel - Hit enter
Download and install numpy+mkl, scipy, and wxpython prebuilt versions.
- Go to
http://www.lfd.uci.edu/~gohlke/pythonlibs/
and download:
numpy-x.y.z+mkl-cp27-cp27m-win32.whl(wherex.y.zis the version number).scipy-x.y.z-cp27-cp27m-win32.whl(wherex.y.zis the version number).wxPython_common‑3.0.2.0‑py2‑none‑any.whlwxPython‑3.0.2.0‑cp27‑none‑win32.whl
- Note: It is important to download the cp27 win32 version, otherwise installation will fail!
- Open a command prompt window as in the previous step (if necessary).
- Navigate to the folder where you downloaded these files.
- The easiest way to do this is to type
cdfollowed by a space, then drag the folder from the Explorer window into the command prompt window. You should see the path to the folder appear in the command prompt. Hit enter after that. - Alternatively, in Explorer right click on the folder in the title bar and select . Then right click on the command prompt and select .
- The easiest way to do this is to type
- Type
pip install numpy-x.y.z+mkl-cp27-cp27m-win32.whl, replacing thex.y.zwith the appropriate version number. Hit enter. - Type
pip install scipy-x.y.z-cp27-cp27m-win32.whl, replacing thex.y.zwith the appropriate version number. Hit enter. - Type
pip install wxPython_common‑3.0.2.0‑py2‑none‑any.whland hit enter. - Type
pip install wxPython‑3.0.2.0‑cp27‑none‑win32.whland hit enter.
- Go to
http://www.lfd.uci.edu/~gohlke/pythonlibs/
and download:
# Install matplotlib, pillow, lxml, h5py, fabio, weave, hdf5plugin, and pyfai using pip.
- Type
pip install matplotlib pillow lxml h5py fabio weave hdf5plugin pyfaiand hit enter.
Download RAW from sourceforge ( http://sourceforge.net/projects/bioxtasraw)
- Go to the Files tab on the linked website and download the
RAW-x.y.z-Source.zipfile, wherex.y.zis the version number (for example, 1.0.0).
- Go to the Files tab on the linked website and download the
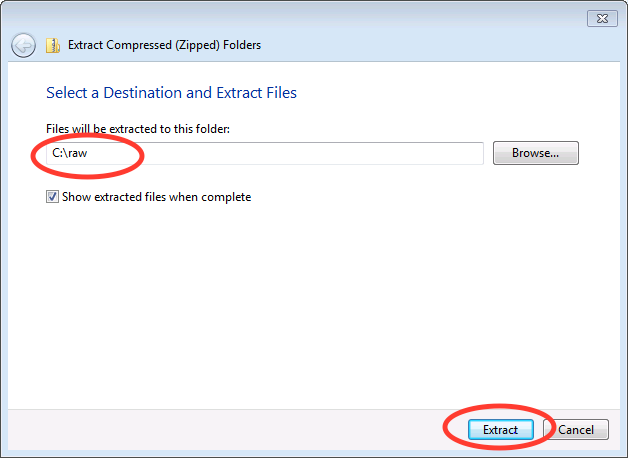
Expand the downloaded zip file into the downloads folder
- Right click on the download and select
- Accept the default location for files to be extracted.
Check that the files are located at the top of the directory, as in the following image:
- Windows 7: Browse to Computer -> Local Disk -> raw
- Windows 8 and 10: Browse to This PC -> Local Disk -> raw
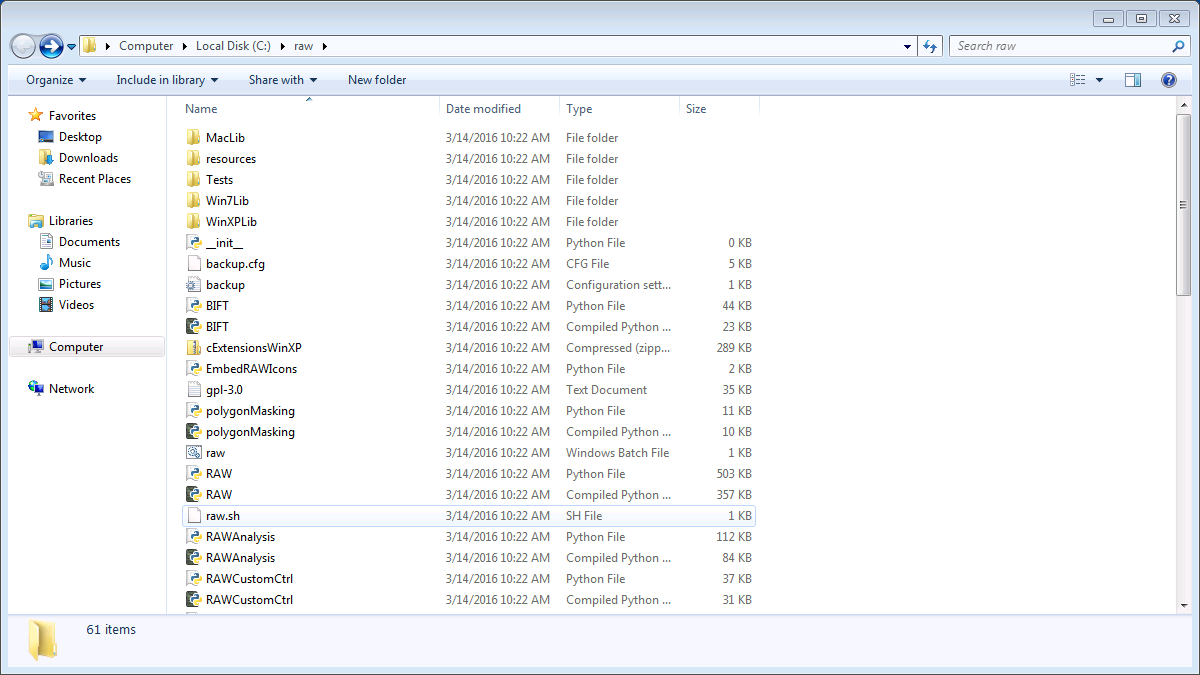
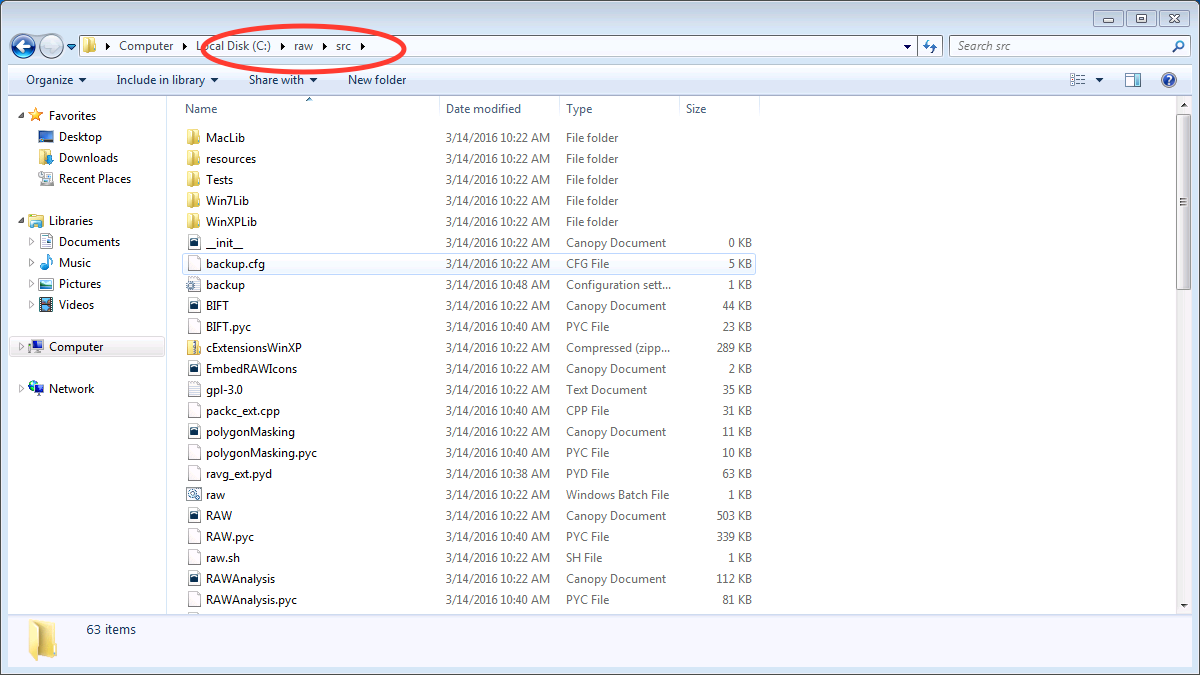
- You may have only a single subfolders, named something like
raworsrc.
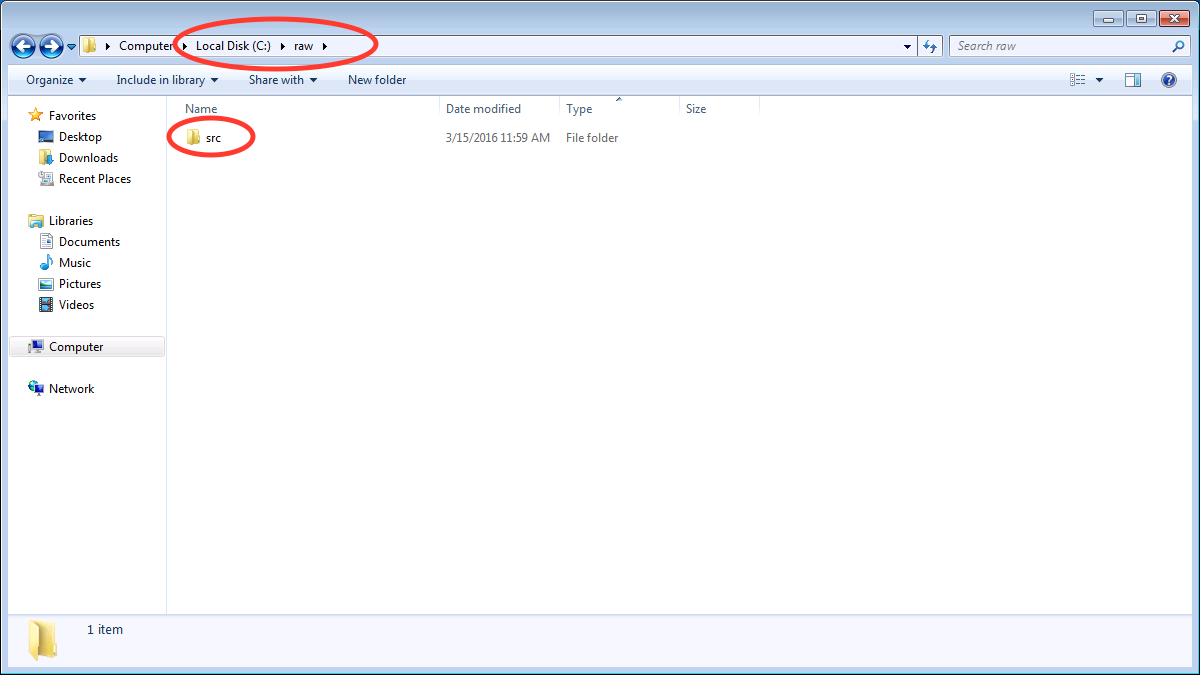
- If so, browse down levels until you find the directory containing files that
look like the top image on this page, and copy everything in that folder to
the top level
rawdirectory.
Run
RAW.pyfrom the command line- Open a command prompt as in Step 6 of these instructions.
- Type
cd C:\raw - Hit enter
- Type
python RAW.py
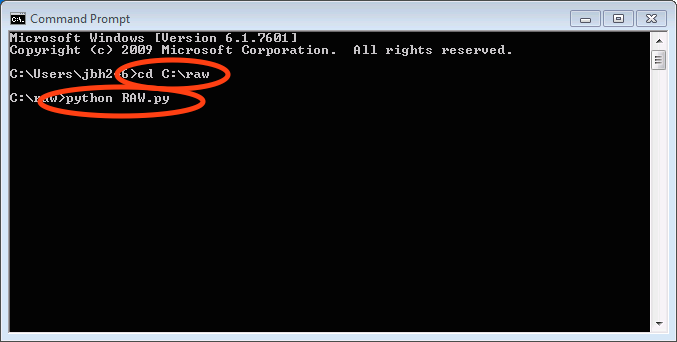
- Hit enter
- When you start RAW for the first time, it compiles various extensions, this may take a while. Please be patient.
Enjoy!
- After running RAW for the first time, you can start it without using the command
line simply by double clicking on
RAW.pyin theC:rawfolder. - If you want to create a desktop shortcut, right click on
RAW.pyand select . - If you have trouble with the installation, please see the solutions to common problems section below.
- After running RAW for the first time, you can start it without using the command
line simply by double clicking on