OS X and macOS install from source instructions
Install Miniconda python distribution
Download the free miniconda python 2.7 installer from: https://conda.io/miniconda.html
- Make sure you get the python 2.7 version!
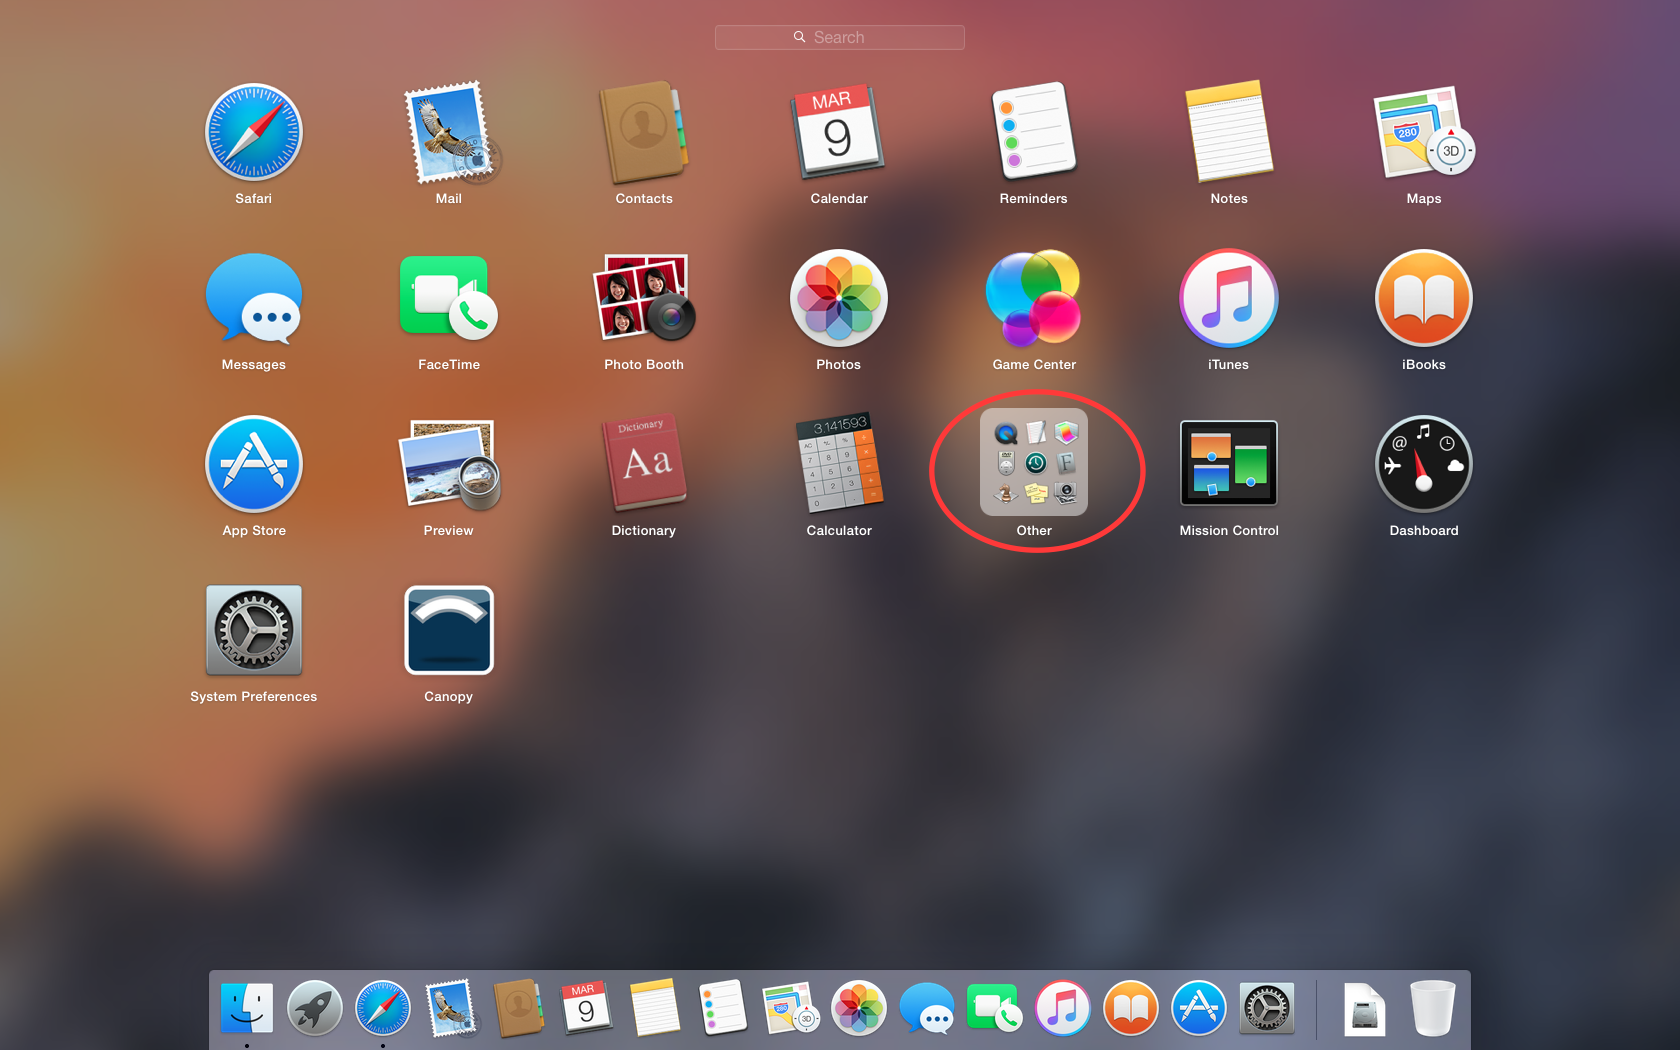
Open a Terminal window by starting the Terminal app.
- Using the Launcher, it is located in the Other section.
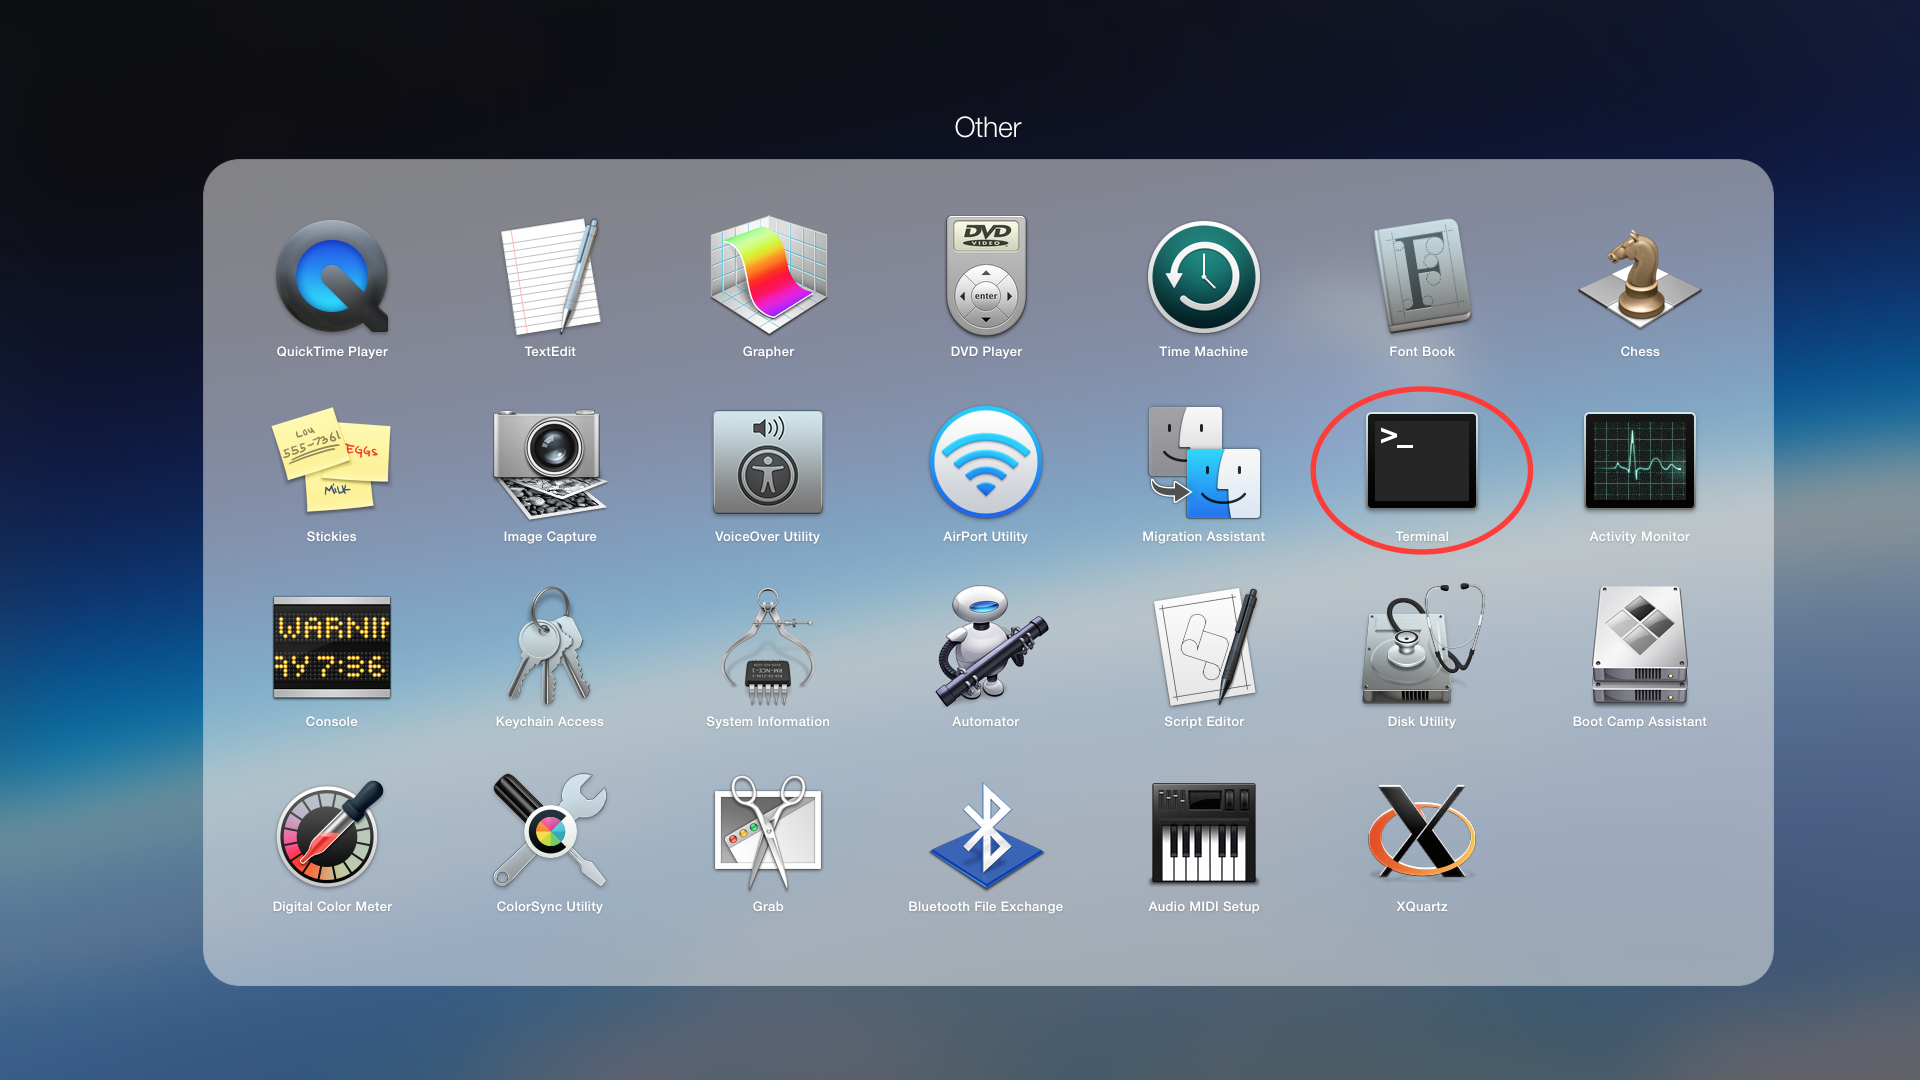
- Browsing the Applications folder in Finder, Terminal is in the Utilities folder.
In the terminal window type
cd ~\Downloadsand hit enter.In the terminal window type
bash Miniconda2-latest-MacOSX-x86_64.shand hit enter.Agree to all of the prompts.
More detailed install instructions are available here: https://conda.io/docs/user-guide/install/macos.html
Close the terminal window.
Install numpy scipy matplotlib pillow wxpython numba h5py lxml cython numexpr using conda.
- Open a new terminal window as in the previous step
- Type
conda upgrade conda pip wheel setuptoolsand hit enter. Agree to all the prompts. - Type
conda install numpy scipy matplotlib pillow wxpython numba h5py lxml cython numexprand hit enter. Agree to all the prompts.
Install the hdf5plugin, silx, fabio, and pyFAI packages using pip
- In the terminal window type
pip install hdf5plugin silx fabio pyfai - Hit enter
- Once the installation finishes, close the terminal window.
- In the terminal window type
- Download RAW from sourceforge
- http://sourceforge.net/projects/bioxtasraw
- Navigate to the Files tab and download the latest source code,
RAW-x.y.z-Source.zip. Or download the latest development version from the git by navigating to the Code tab.
Expand the downloaded zip file in the Downloads folder by double clicking on it.
- This step may not be necessary, some browsers may automatically expand zip files.
Check if the top level directory contains files that look like the following image.
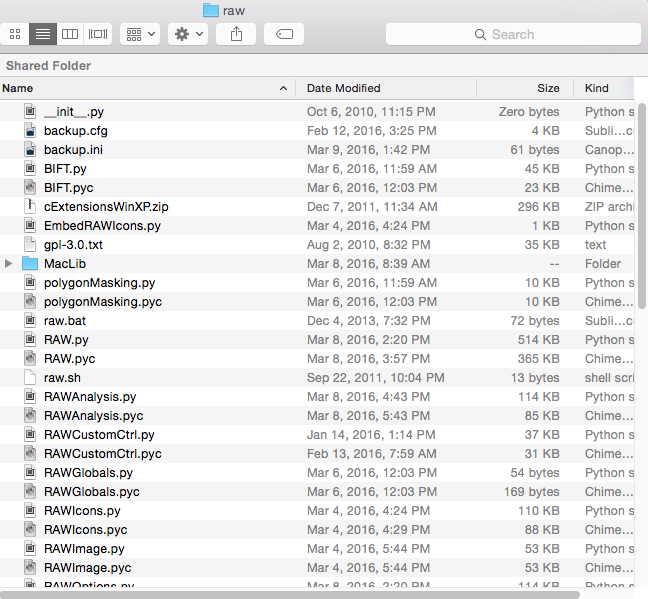
If you see only a single folder, navigate down through the folders until you find a folder with all of the files in it, as in the above image.
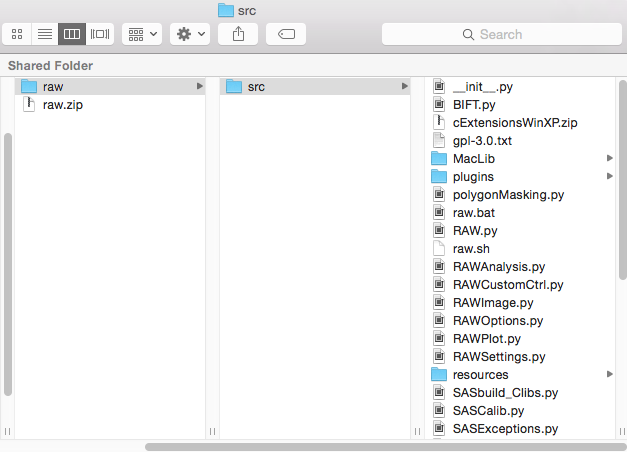
- An example of this is shown below, where the expanded files has an
srcdirectory in it, which contains all of the downloaded files.
- An example of this is shown below, where the expanded files has an
Move these files to Applications folder
- Move the folder that contains all of the RAW files to the
Applicationsfolder. In the above image, this would be thesrcfolder. - Rename the folder that you just moved to
raw.
- Move the folder that contains all of the RAW files to the
Run RAW from the terminal.
- Open a terminal window as in step 1.
- Type
cd /Applications/raw - Hit enter
- Type
pythonw RAW.py - Hit enter
- When you start RAW for the first time, it compiles various extensions. This may take some time. Please be patient.
Enjoy!
- In the future, you can start RAW as in the previous step.
- If you want, see the section on making a clickable shortcut for RAW
- If RAW doesn’t work, check out the solutions to common problems
Setting up a RAW shortcut
The easiest way to set up a RAW shortcut is to expand the RunRAW.zip file in the RAW
MacLib folder, and move the RunRAW app to wherever you want to have it. Start raw
by double clicking on the RunRAW app.
- Note: since this is an application from an unknown developer (the RAW team!), you may have to give it permission to run. You can do this by right clicking on it and selecting Open or by changing your security settings by going to System Settings -> Security and Privacy, and selecting Allow apps downloaded from ‘Anywhere’.
If the shortcut doesn’t work, and/or you would rather not change your security settings, you can follow these instructions to make your own shortcut:
Expand the
RunRAW.zipfile as above.Open the Automator app
- Automator is located in Applications folder.
Select Open an Existing Document
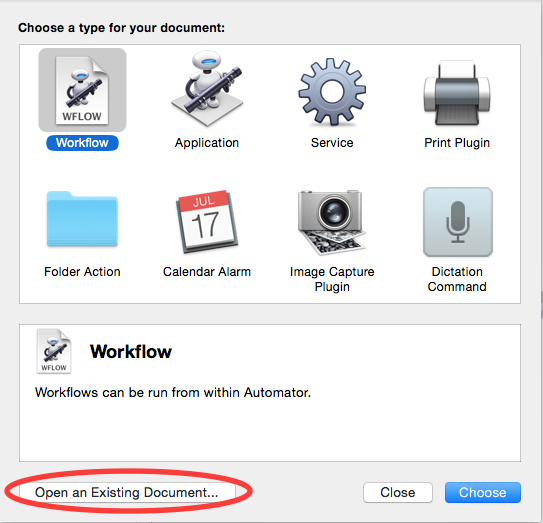
Open the
RunRAWapp (located inApplications/raw/MacLib)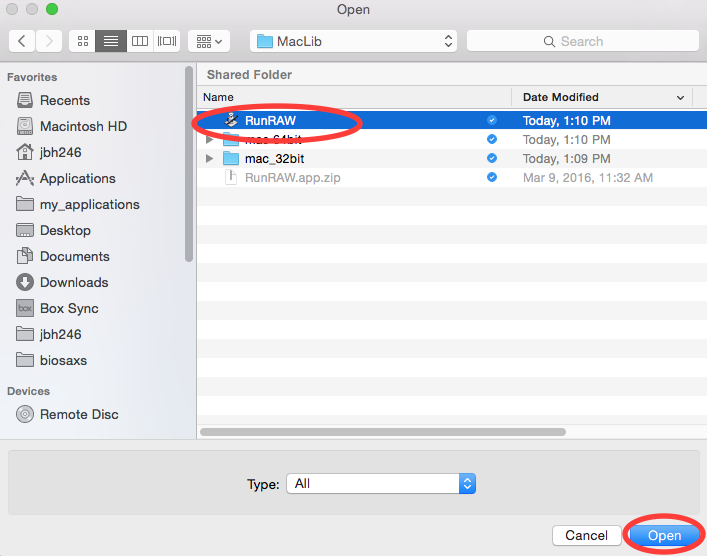
You should see a window like this:
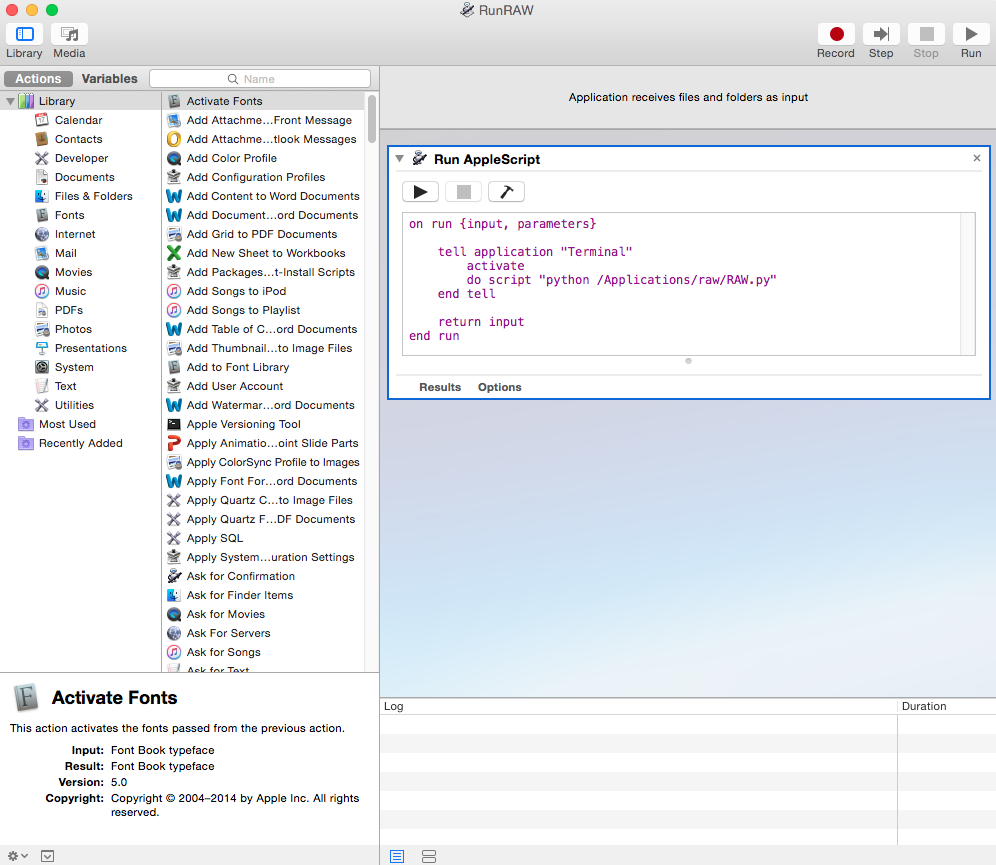
- Note: If you didn’t install RAW in the recommended location, you will need to
change the line
do script “pythonw /Applications/raw/RAW.py”to have the appropriate path.
- Note: If you didn’t install RAW in the recommended location, you will need to
change the line
Select from the menu.
In the duplicate window (should be named RunRAW copy or Untitled), select .
Save the file as
RunRAW(.app, if you are showing extensions) wherever you want to have the shortcut.- Note: you can name it whatever you want. RunRAW is just the default name.
Now you can launch raw just by double clicking the RunRAW icon.
- If it doesn’t work, make sure that you saved the duplicate, rather than the original!