RAW Install Guide for macOS and OS X
Introduction
There are two ways to install RAW on Mac. The easiest, and recommended, way is to use a prebuilt app package (.dmg file). If you want to install a version for which there is no prebuilt installer, you will need to install RAW from the source code.
This guide contains instructions for:
- Using a prebuilt app package (recommended):
- Mac OS X 10.9, 10.10, 10.11, and macOS 10.12 (may work for OS X <10.9)
- General instructions to install from source for advanced users
- Detailed instructions to install from source for
- Mac OS X 10.9, 10.10, 10.11 and macOS 10.12, (probably works for OS X <10.9)
- How to make a clickable shortcut to start RAW
It also provides solutions to common problems.
These install instructions have been tested on OS X 10.9, 10.10, 10.11 and macOS 10.12. We expect they will work for earlier versions as well.
Conventions: things to type are in italics, file paths and file names are in bold.
Using a prebuilt app package
The recommended way to install RAW on Mac is using a prebuilt app package. To install from a prebuilt app package simply download the RAW-X.Y.Z-mac.dmg (where X.Y.Z is the version number) file from sourceforge ( http://sourceforge.net/projects/bioxtasraw), double click it to open the dmg, and drag the RAW.app file to your Applications folder (or wherever you want to install RAW).
Important Notes:
- Because the RAW team is an unidentified developer, you may get a warning message
the first time you run the program. If that happens, right click on RAW and
select “Open” from the right click menu, and then click the “Open” button in the
window that appears.
- Note: This requires administrator permissions.
General instructions for installing from source (advanced users)
- Install a standalone version of python 2.7 (recommended, not required).
- Install a gcc c++ compiler (for example. Xcode command line tools) and add it to your system path.
- Install the following python packages (most recent version of each recommended):
- numpy
- scipy
- matplotlib
- pillow
- wxpython
- fabio
- lxml
- h5py
- cython
- pyFAI
- hdf5plugin
- weave
- Download RAW from sourceforge ( http://sourceforge.net/projects/bioxtasraw)
- Extract RAW to a directory of your choice and run RAW.py using python.
- Note: the first time you run RAW.py it may need to be run from the command line in order to successfully compile various extensions. It may take some time to compile the extensions, be patient.
- Enjoy!
- If you have problems, please consult the detailed installation guide and the solutions to common problems below. If that doesn’t help, please contact the developers.
OS X and macOS install from source instructions
Install Enthought Canopy python distribution
- Download the free canopy installer from:
https://store.enthought.com/downloads/#default
- Academics are encouraged to create an account with their .edu e-mail, log in, and download the full version for free. This gets you more packages, and better support/updates.
- We recommend the 64-bit version, unless you know you need the 32-bit version.
- Open the downloaded disk image, and drag the Canopy application into the Applications folder
- Start the Canopy application (for example, double click on it in the Applications folder).
- Canopy may not open, depending on user security settings. You have two
options if it doesn’t open:
- Open canopy by right clicking on it in the applications folder and selecting ‘open’.
- Change security settings by going to System Settings -> Security and Privacy, and selecting Allow apps downloaded from ‘Anywhere’.
- Accept the default environment install location
- Canopy may not open, depending on user security settings. You have two
options if it doesn’t open:
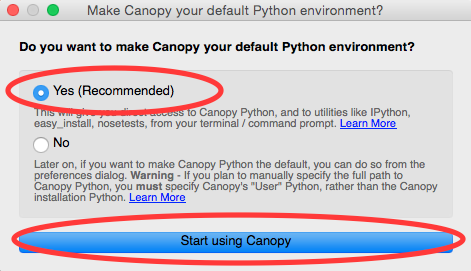
- The first time you run Canopy, it will ask you if you want to make it the default environment. Select Yes and Start using Canopy
- More detailed install instructions are available here: http://docs.enthought.com/canopy/quick-start/install_macos.html
- Download the free canopy installer from:
https://store.enthought.com/downloads/#default
Install xcode command lines tools
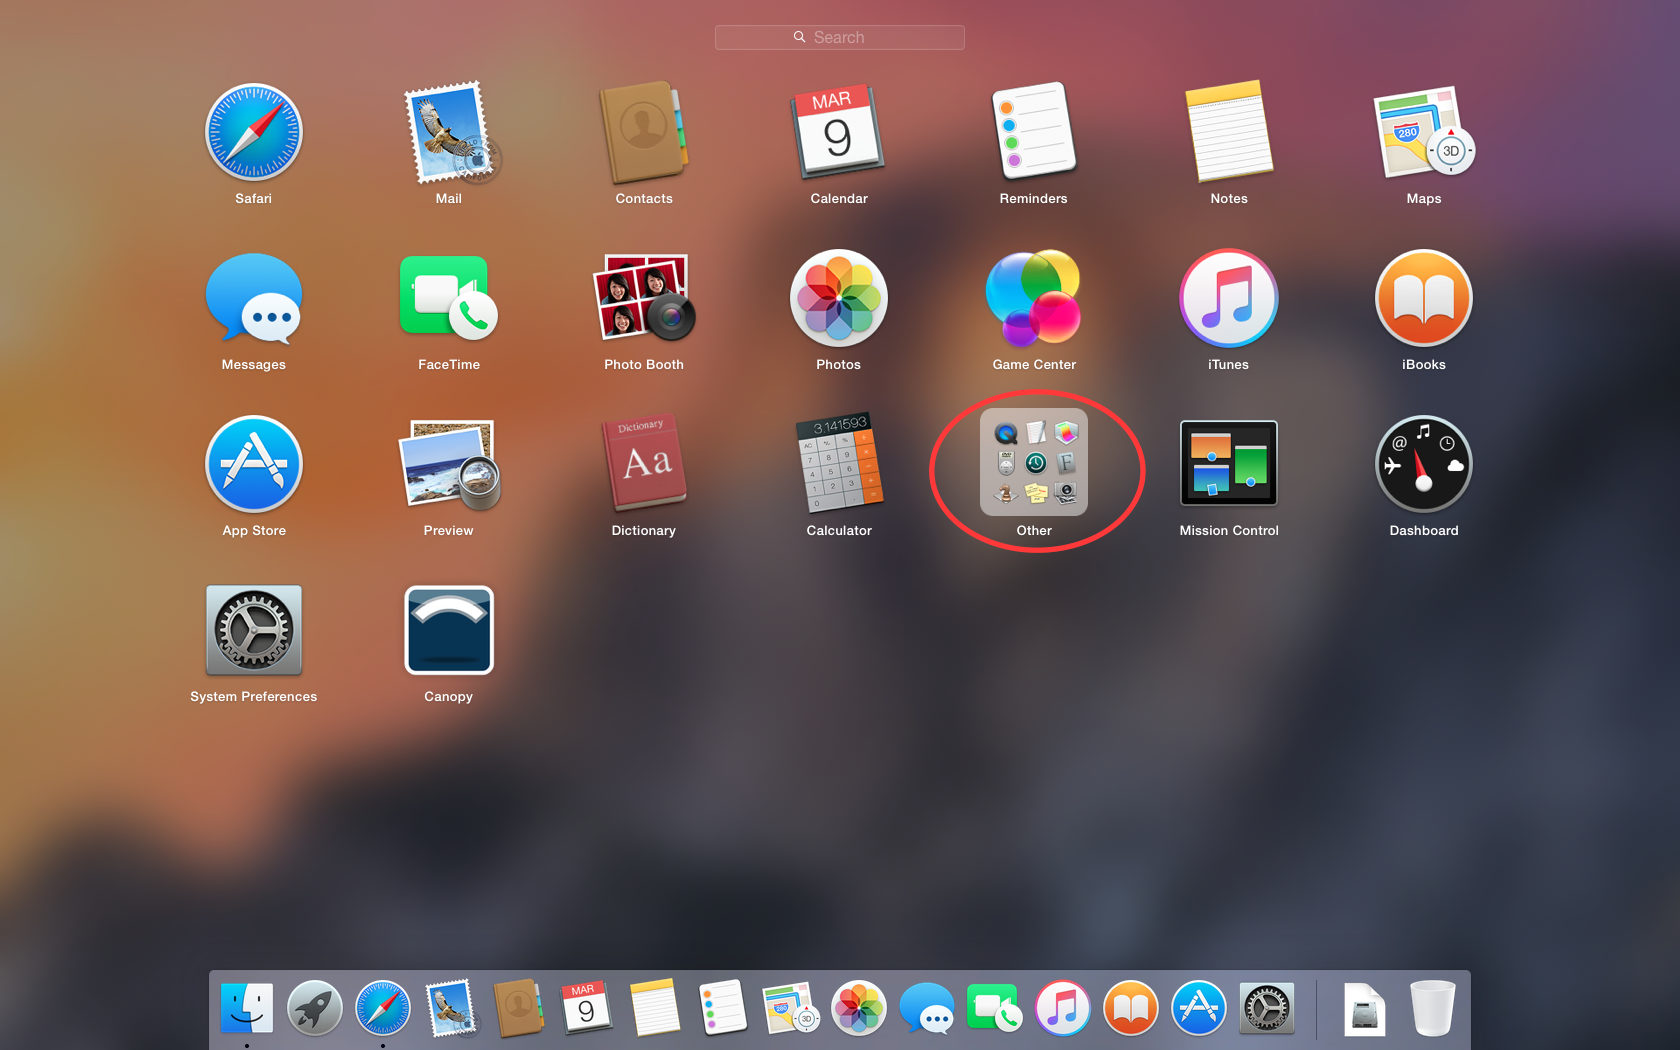
Opening a Terminal window by starting the Terminal app.
- Using the Launcher, it is located in the Other section.
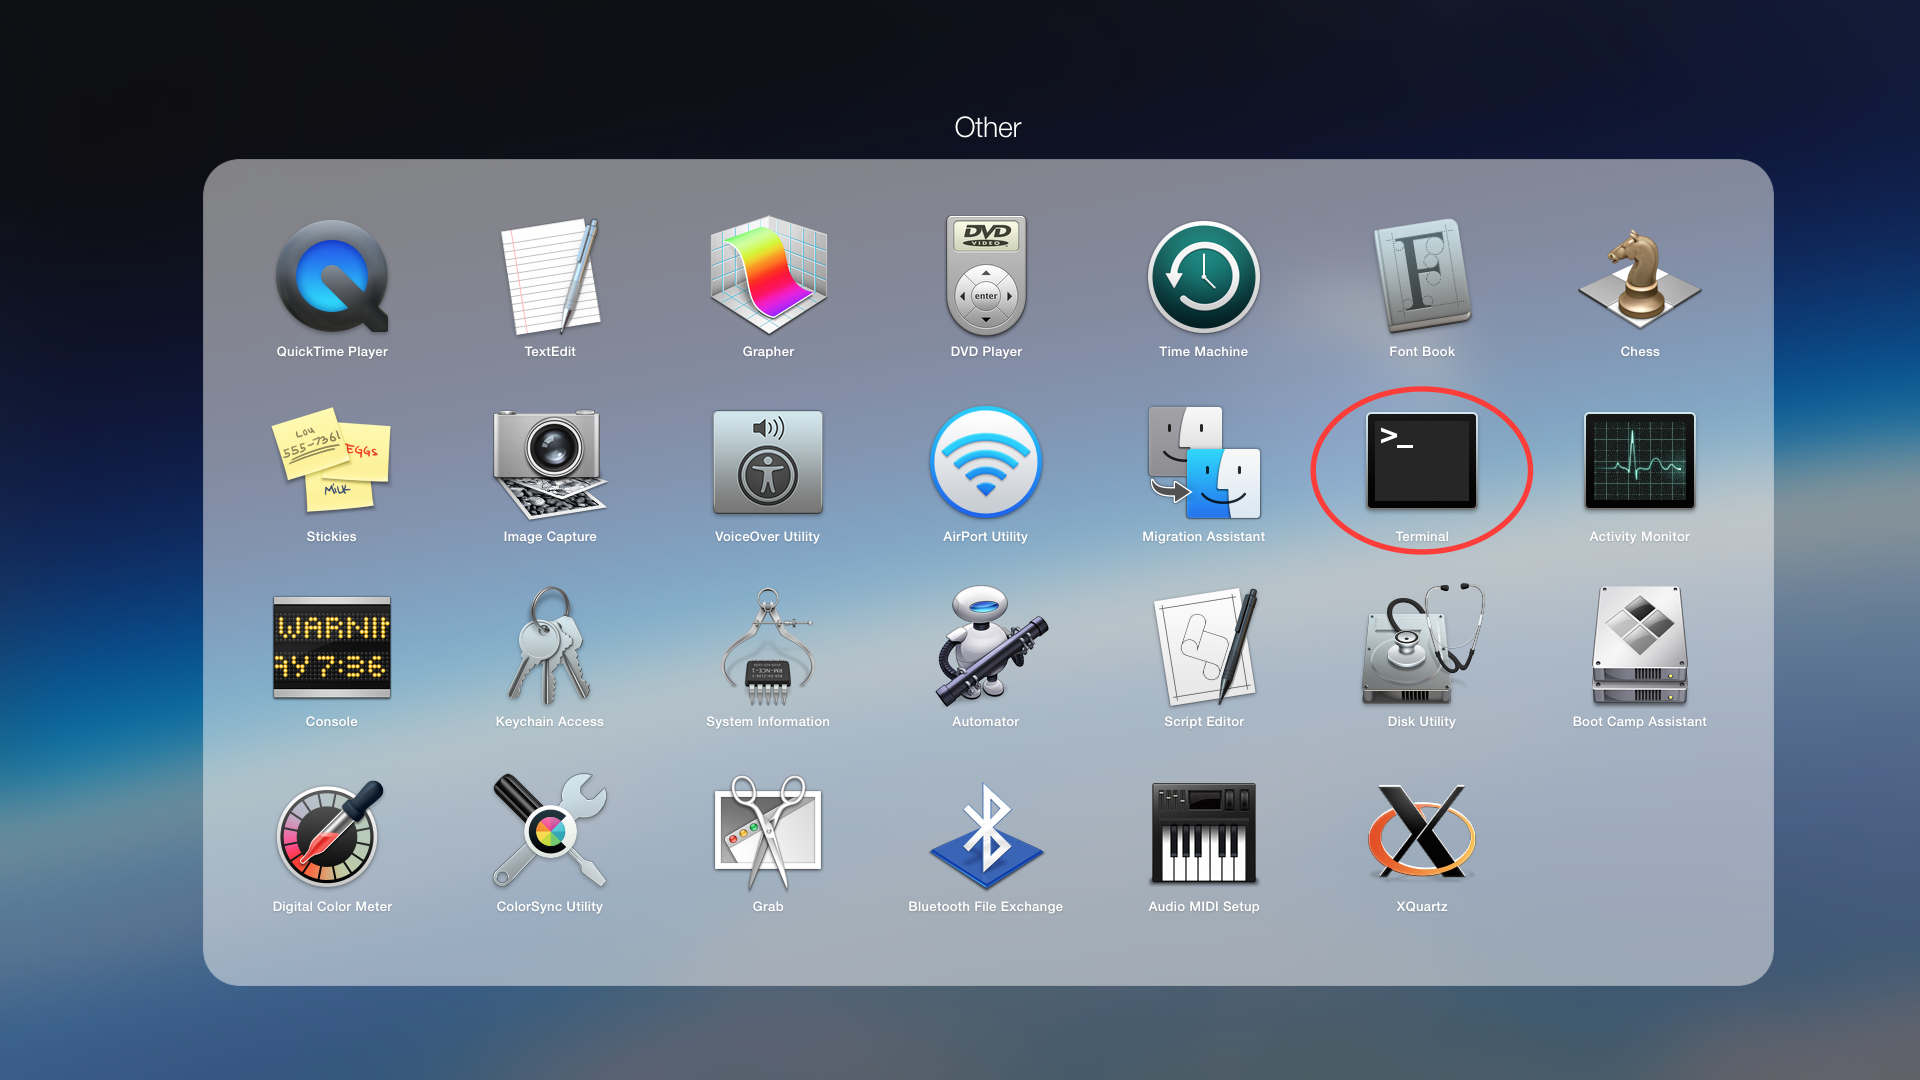
- Browsing the Applications folder in Finder, Terminal is in the Utilities folder.
In the terminal window type xcode-select –install
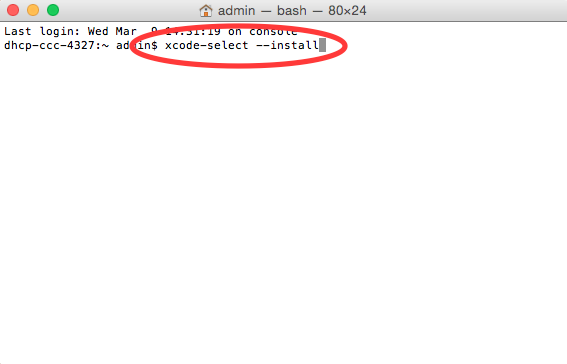
- Hit enter
- In the popup window, select install (you don’t need the whole xcode installation)
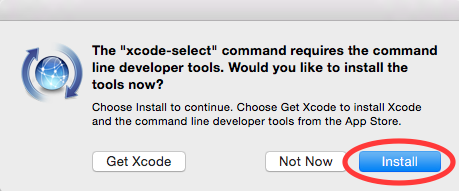
- Close the terminal window.
Install the fabio, pyFAI, hdf5plugin, and weave python packages using pip
- Open a terminal window as in step 2.
- Type pip install –upgrade pip
- Hit enter
- Once that installs, type pip install fabio pyFAI hdf5plugin weave
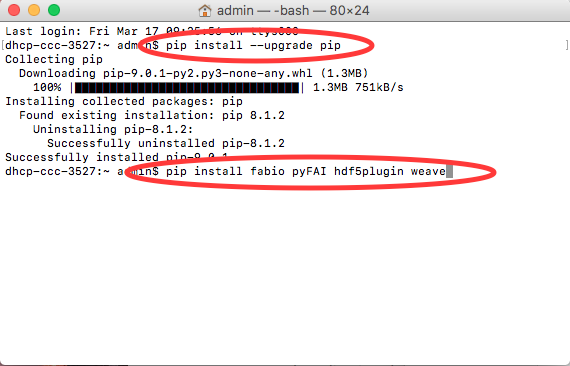
- Hit enter
- Once the installation finishes, close the terminal window.
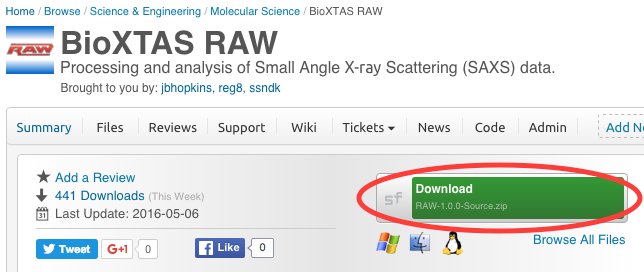
Download RAW from sourceforge
- http://sourceforge.net/projects/bioxtasraw
- The sourceforge download button should automatically default to the correct download for OS X.
Expand the downloaded zip file in the Downloads folder by double clicking on it.
- This step may not be necessary, some browsers may automatically expand zip files.
Check if the top level directory contains files that look like the following image.
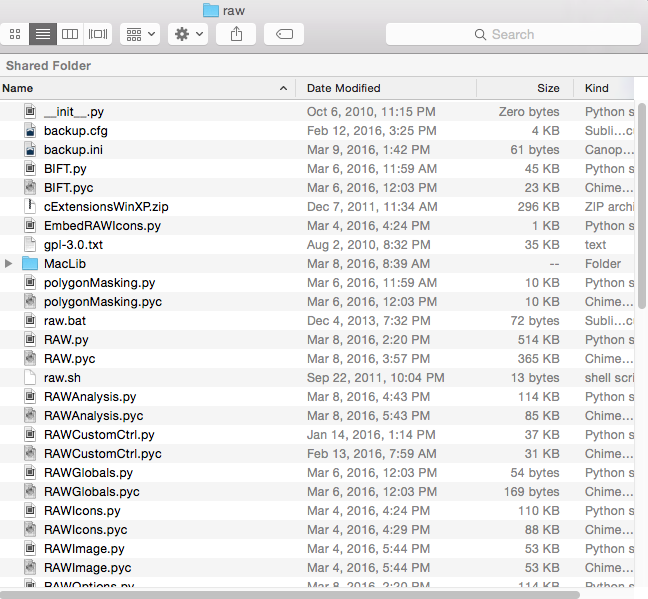
If you see only a single folder, navigate down through the folders until you find a folder with all of the files in it, as in the above image.
- An example of this is shown below, where the expanded files has an src directory in it, which contains all of the downloaded files.
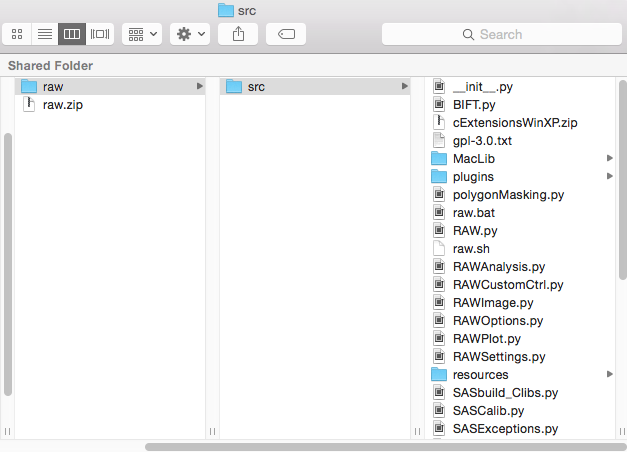
Move these files to Applications folder
- Move the folder that contains all of the RAW files to the Applications folder. In the above image, this would be the src folder.
- Rename the folder that you just moved to raw.
Run RAW from the terminal.
- Open a terminal window as in step 2.
- Type cd /Applications/raw
- Hit enter
- Type python RAW.py
- Hit enter
- When you start RAW for the first time, it compiles various extensions. This may take some time. Please be patient.
Enjoy!
- In the future, you can start RAW as in the previous step.
- If you want, see the section on making a clickable shortcut for RAW
- If RAW doesn’t work, check out the solutions to common problems
Setting up a RAW shortcut
The easiest way to set up a RAW shortcut is to expand the RunRAW.zip file in the RAW MacLib folder, and move the RunRAW app to wherever you want to have it. Start raw by double clicking on the RunRAW app.
- Note: since this is an application from an unknown developer (the RAW team!), you may have to give it permission to run. You can do this by right clicking on it and selecting ‘Open’ or by changing your security settings by going to System Settings -> Security and Privacy, and selecting Allow apps downloaded from ‘Anywhere’.
If the shortcut doesn’t work, and/or you would rather not change your security settings, you can follow these instructions to make your own shortcut:
Expand the RunRAW.zip file as above.
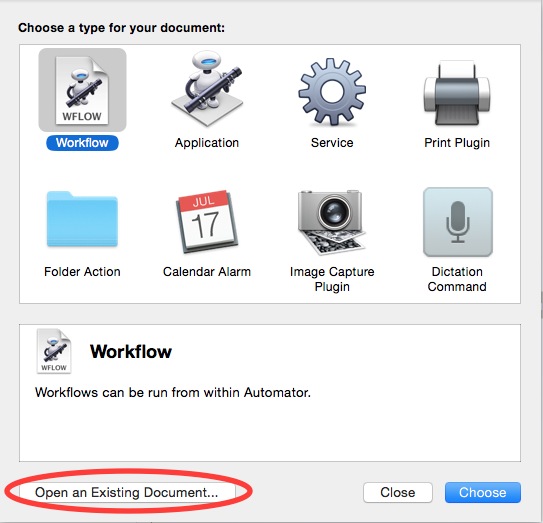
Open the Automator app
- Automator is located in Applications folder.
Select Open an Existing Document
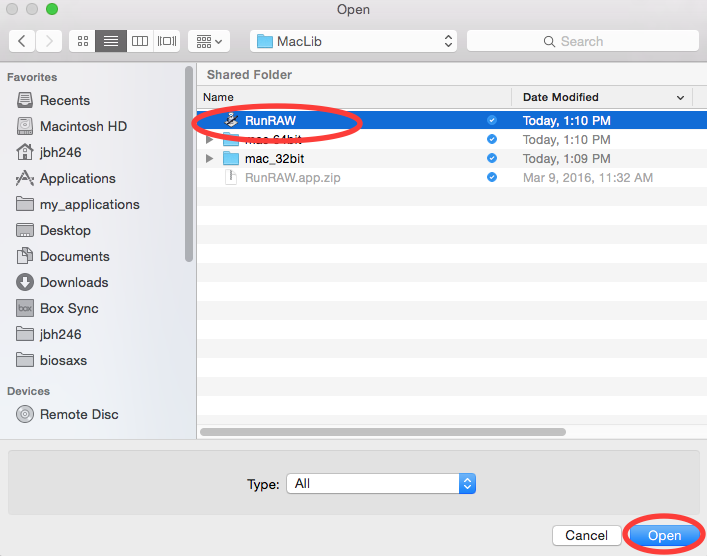
Open the RunRAW app (located in Applications/raw/MacLib
You should see a window like this:
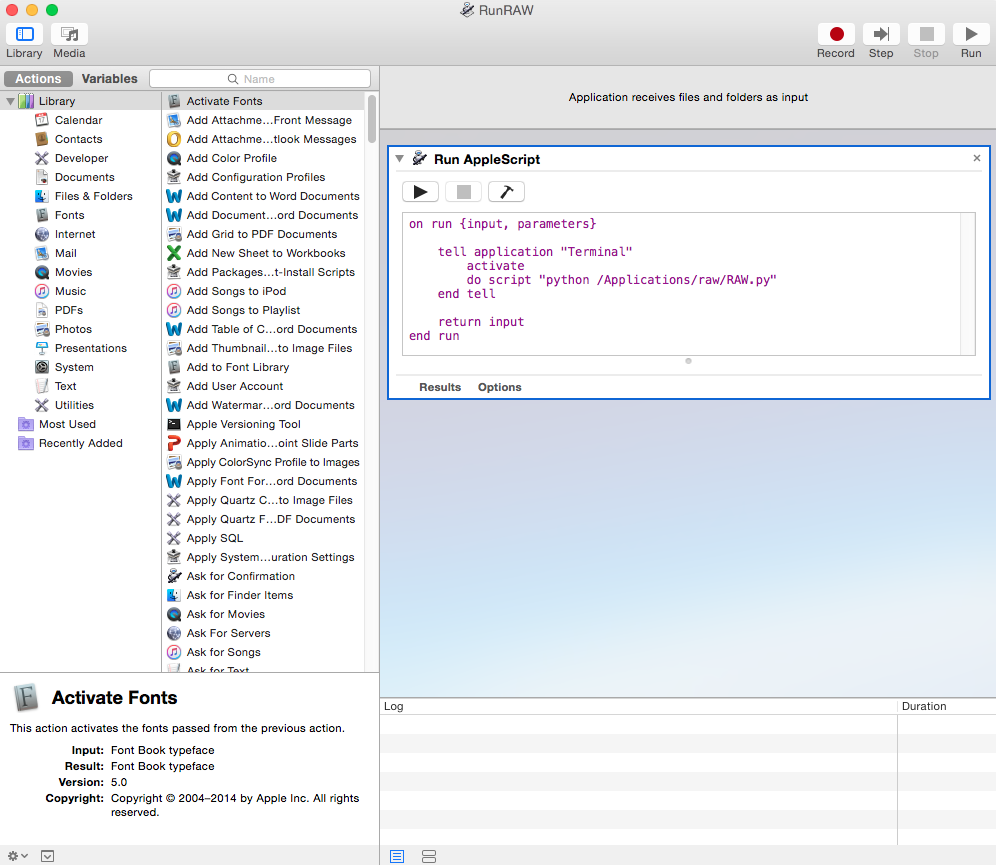
- Note: If you didn’t install RAW in the recommended location, you will need to change the line do script “python /Applications/raw/RAW.py” to have the appropriate path.
Go to the File menu and select Duplicate
In the duplicate window (should be named RunRAW copy or Untitled), go to the File menu and select Save.
Save the file as RunRAW (.app, if you are showing extensions) wherever you want to have the shortcut.
- Note: you can name it whatever you want. RunRAW is just the default name.
Now you can launch raw just by double clicking the RunRAW icon.
- If it doesn’t work, make sure that you saved the duplicate, rather than the original!
Common problems/troubleshooting
Installing the prebuilt app package:
- Because the RAW team is an unidentified developer, you may get a warning message the
first time you run the program. If that happens, right click on RAW and select “Open”
from the right click menu, and then click the “Open” button in the window that appears.
- This requires administrator privileges
- If the above doesn’t work, you can run the RAW app from the command line. Navigate to RAW.app/Contents/MacOS and run the RAW unix executable file (./RAW) in that directory.
Installing from source:
- The compiler can fail if there are any spaces in the directory paths. Make sure that the RAW.py file is installed in a directory path without any spaces.
- If the extensions won’t compile properly (you’ll get a popup message when you start RAW warning you of this), try copying the appropriate precompiled extensions (.so files) from the MacLib folder into the main raw folder.
- The shortcut can fail if you didn’t install raw in the recommended location. If that’s the case, go through the process of creating a new shortcut, and make sure you change the line in the script mentioned in that section.